Incode IDV Integration with Okta
Securely verify identities with Incode and Okta.
This guide provides step-by-step instructions to integrate Incode IDV as an Identity Provider (IdP) in Okta using the new Identity Verification Standard.
Prerequisites
Before starting, ensure you have the following:
- Okta Identity Engine (OIE) instance
- An Okta administrator account with permissions to add/modify Identity Providers and Authentication Policies.
- Access to the Incode Workforce Dashboard.
- Early Access Feature Identity verification with third party identity verification vendors enabled on your Okta instance.

Set up Guide
Step 1: Create Okta IDV Integration in Incode Workforce
- Log in to your Incode Workforce Dashboard.
- Navigate to Integrations from the left-side menu.
- Select Okta IDV Standard.
-
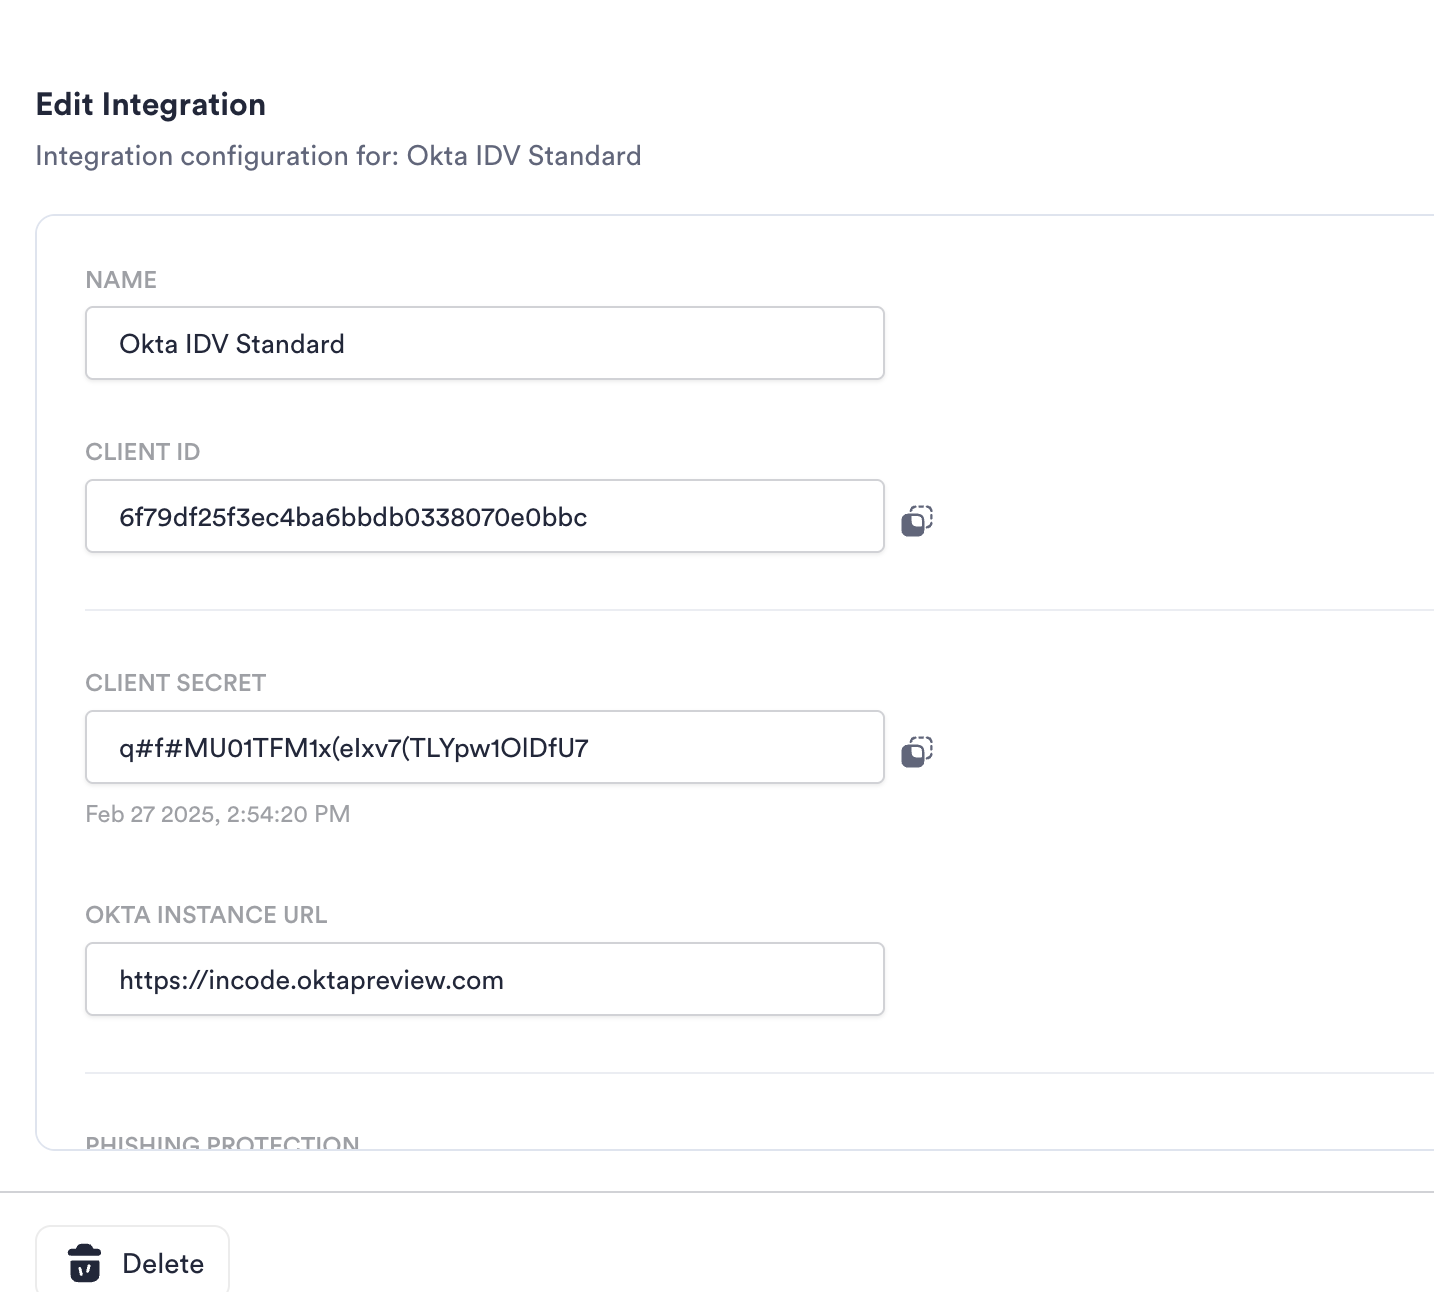
Configure your Okta IDV Standard integration
- Name: Create a name for your integration.
- Client ID: Copy the Client ID to Okta in next steps.
- Client Secret: Copy Client Secret to Okta in next steps.
- Okta Instance URL: Enter the URL for your Okta instance. The URL must be in the following format:
https://your-company-name.okta.com - Make sure to select save after copying to Okta
Step 2: Configure Incode IDV in Okta
- Log in to your Okta Admin Console.
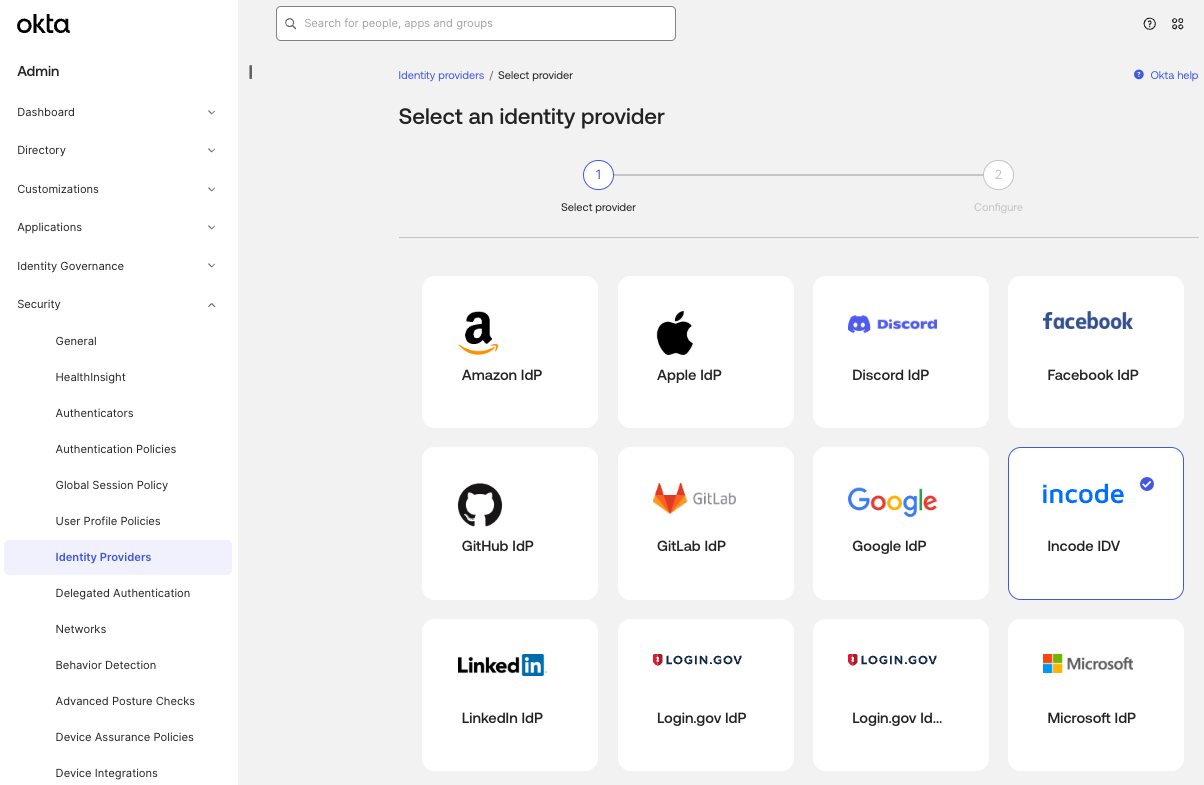
- Navigate to Security and select Identity Providers.
- Select Add Identity Provider and select Incode IDV for Production or Custom IDV for Sandbox.
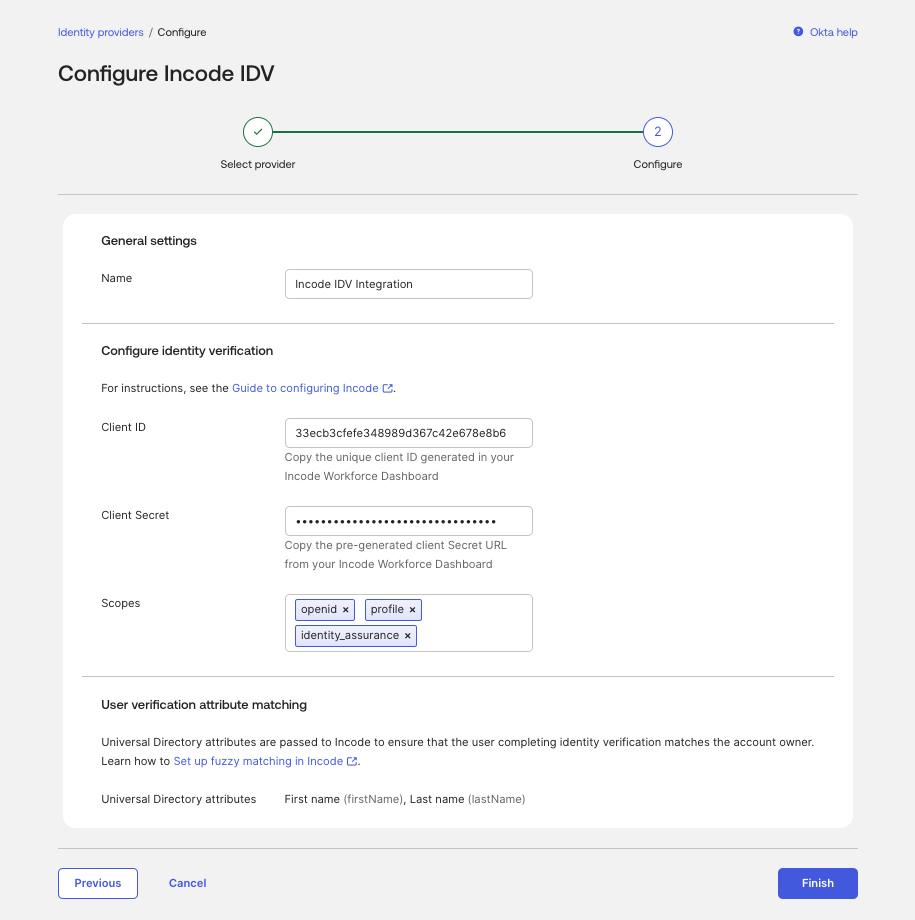
- Create a name for your integration
- Paste Incode Workforce Client ID and Client Secret provided in steps above
- Select Finish and Save in Workforce Application if not already
- For Custom IDV for Sandbox, use the following endpoints:
- Issuer: https://auth.demo.incode.com
- PAR request URL: https://auth.demo.incode.com/oauth2/par
- Authorize URL: https://auth.demo.incode.com/oauth2/authorize
- Token URL: https://auth.demo.incode.com/oauth2/token
- JWKS URL: https://auth.demo.incode.com/oauth2/jwks
How to configure Incode IDV to handle Account Resets
- See this guide on setting up Incode IDV with Okta Account Management Policy.
- For how to setup an Okta Passwordless sign-in experience see here
Updated 4 months ago
Did this page help you?