Setting up Your Workforce Instance
Wizard
The Workforce Wizard is a setup tool designed to simplify the configuration of Incode Workforce for IT administrators. This tool walks you through the initial configuration process, covering key areas such as branding, verification policies, data scope, consent management and connection to your IAM provider. Follow the steps below to ensure that your Workforce platform is tailored to your organization's needs.
Step 1: Admin Account Creation
To begin, you will receive an email from Incode Workforce inviting you to set up your organization's account.

Click the link in the email, and you’ll be prompted to create setup your password. These will serve as your credentials to access the Incode Workforce admin dashboard.
Once logged in, you can begin the setup process through the Dashboard Wizard.
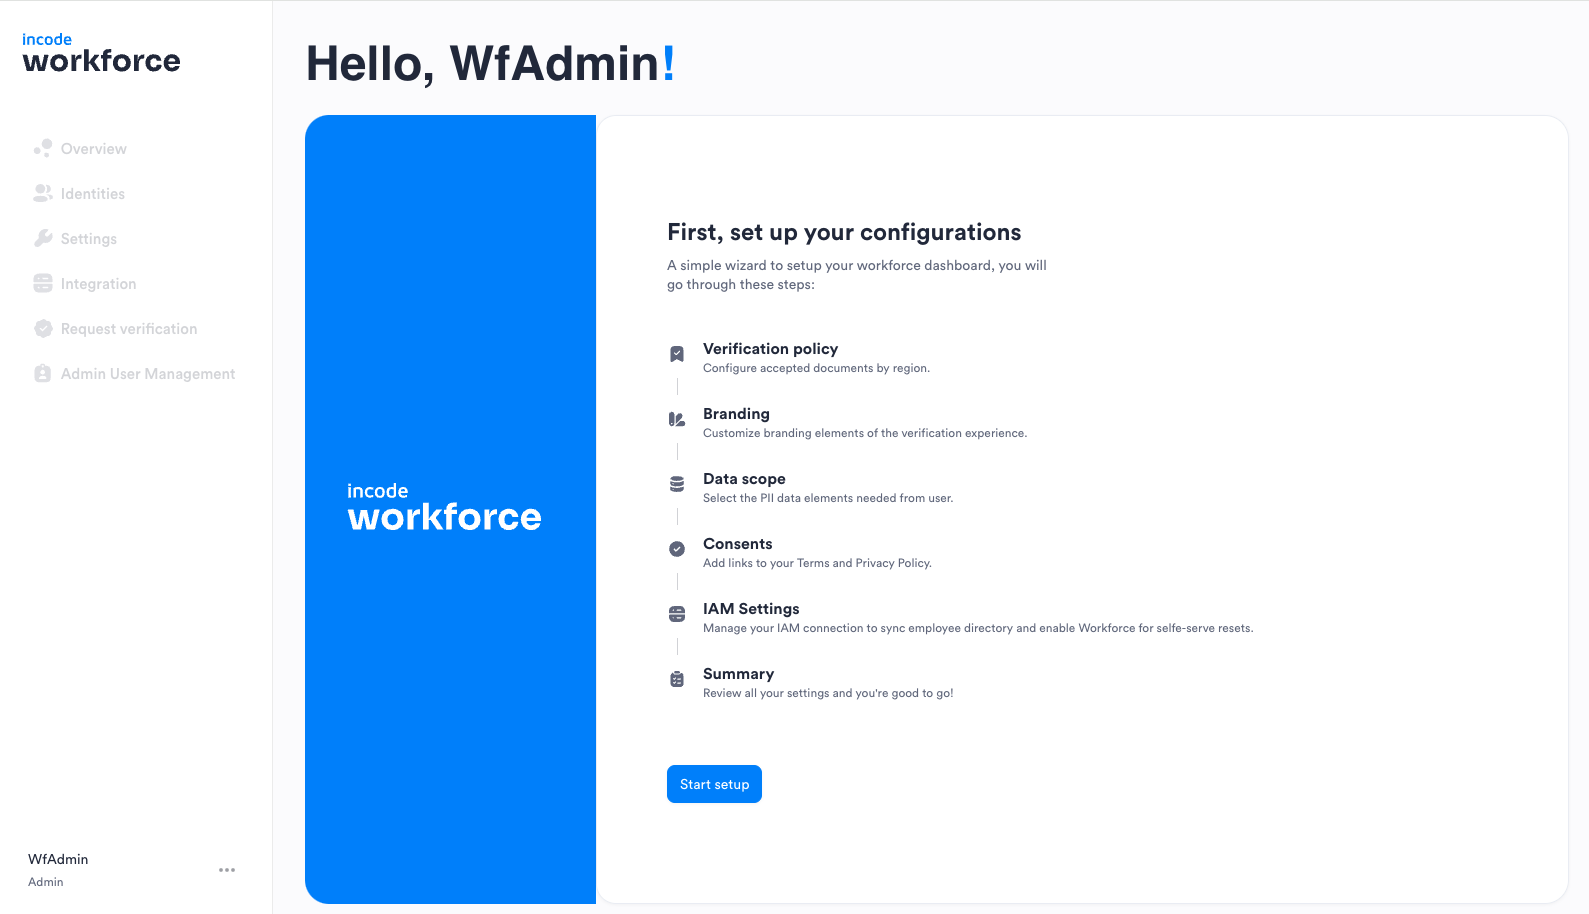
Navigation:
- Use the "Next" and "Back" buttons at the bottom of each screen to move between steps.
- You can save your progress by clicking “Save Draft” at any time, allowing you to return later.
Please note that your configuration isn't final until all stages are completed and confirmed on the summary screen. This ensures you have ample opportunity to refine your setup to best suit your organization’s needs.
Step 2: Configure Verification Policy
-
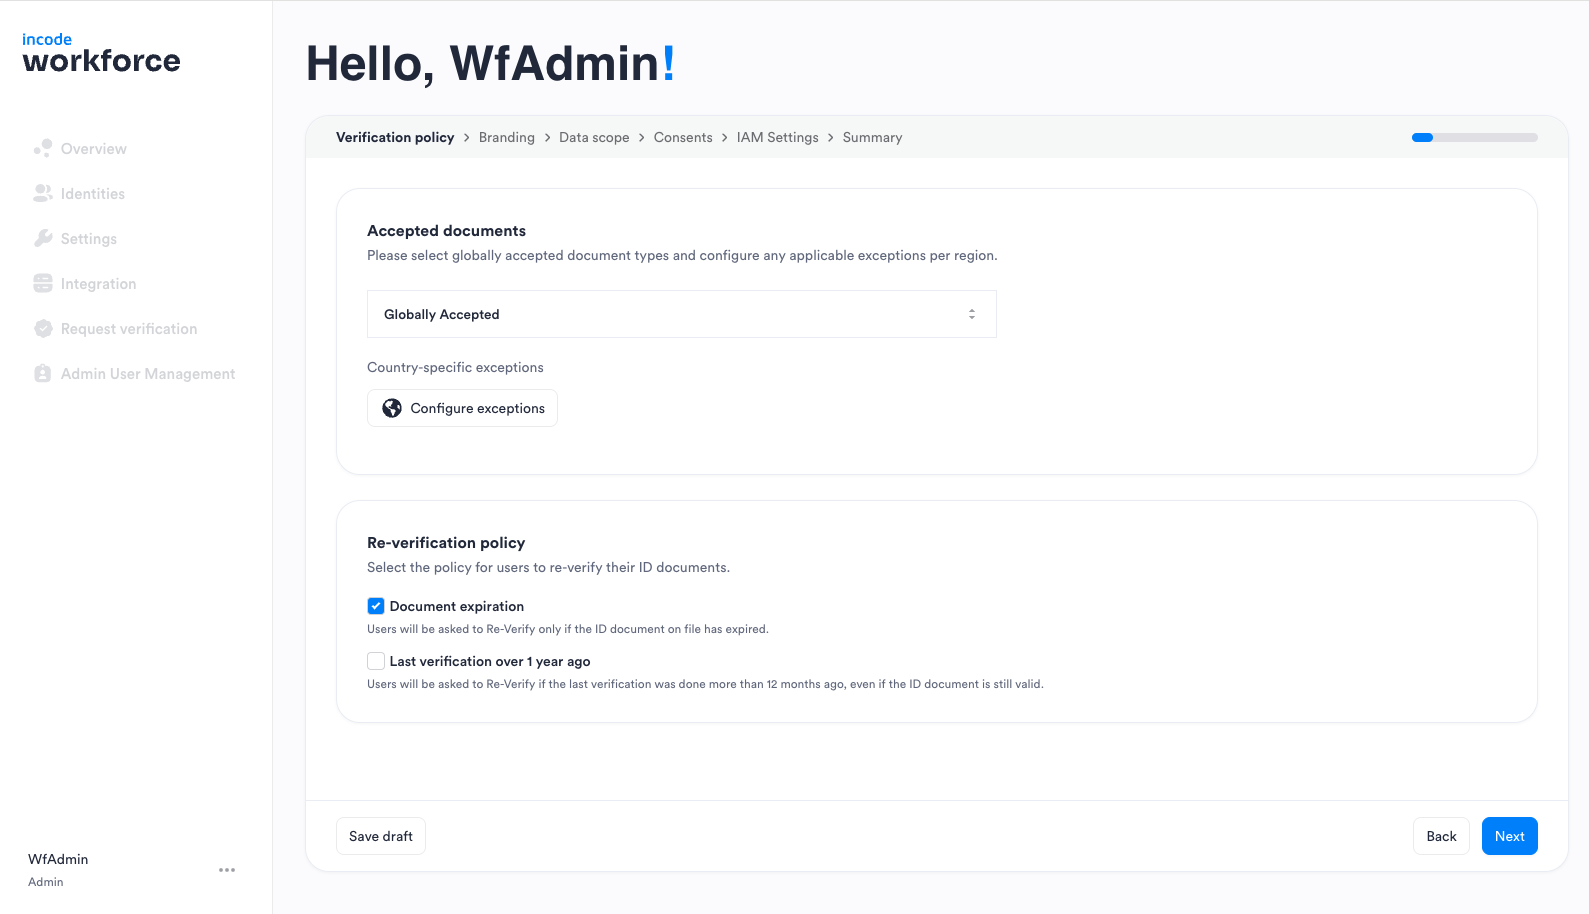
Accepted Documents:
Incode’s verification is based on document verification, allowing businesses to confirm the real-world identity of the employee behind the account. Incode supports the verification of over 4,600 documents across 200 countries, continually adding new documents to ensure flexibility and security.
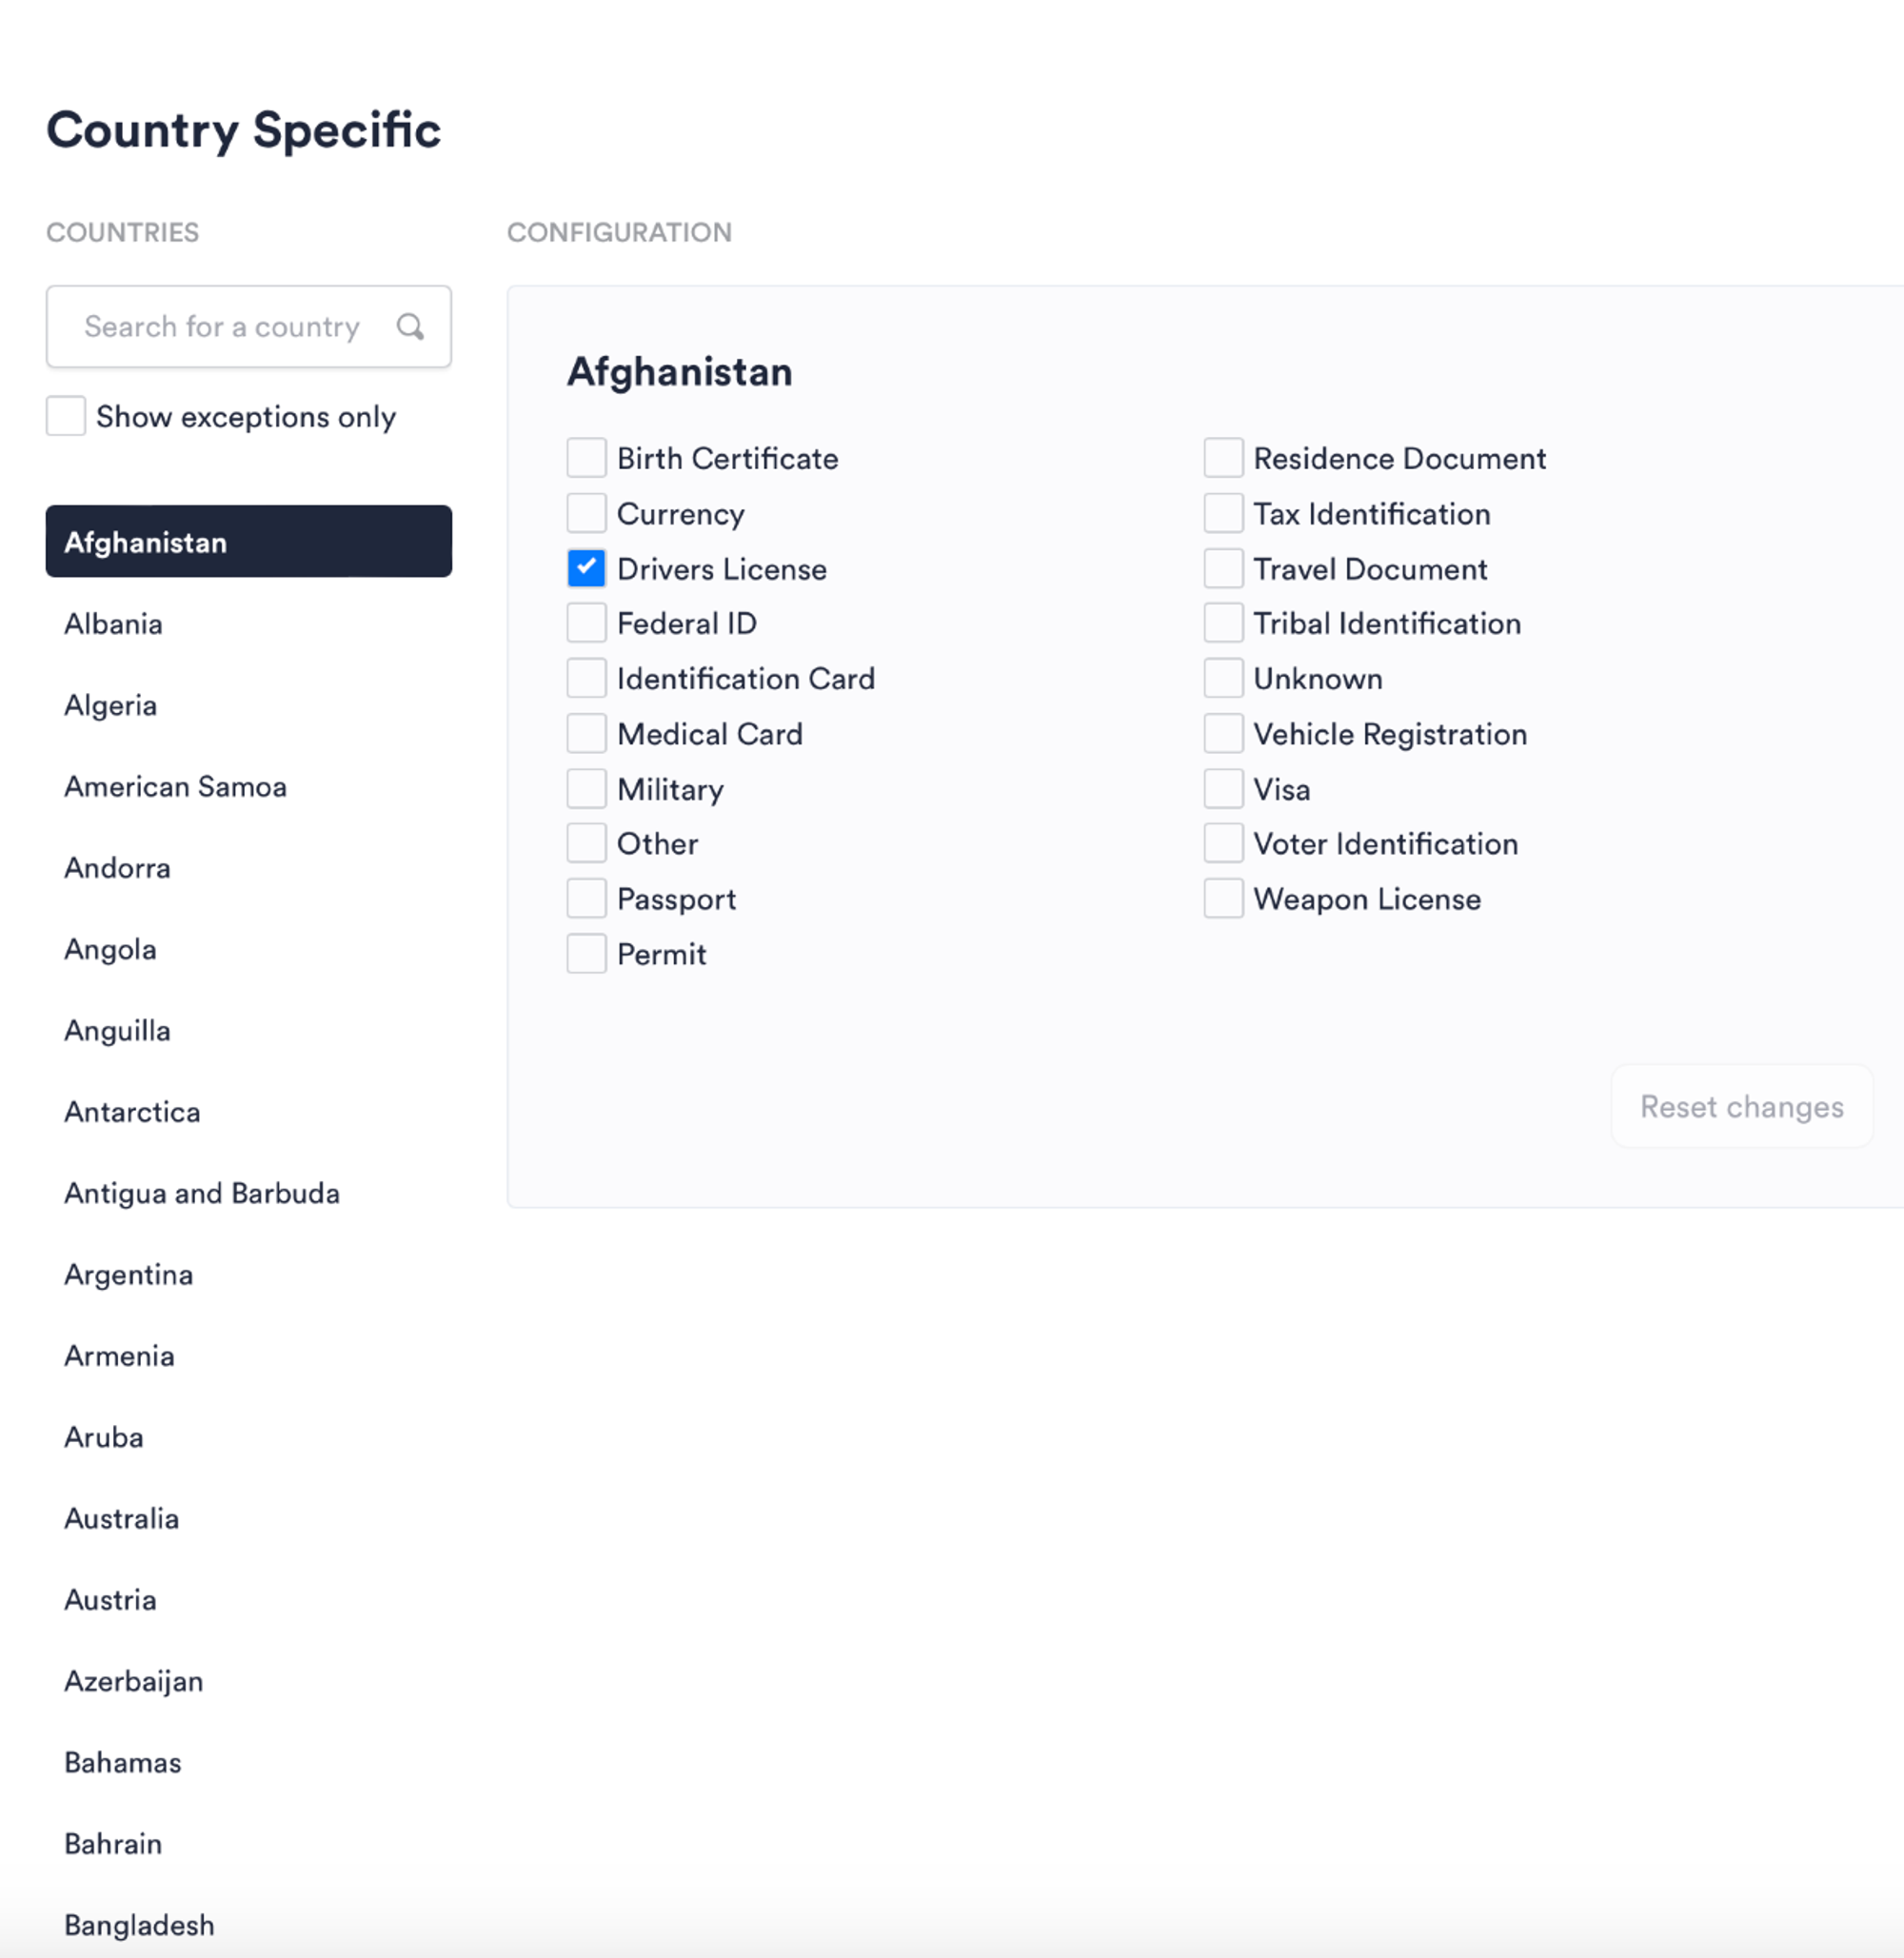
In this step, select the types of identification documents you will accept from employees as part of the verification process. By default, all document types are enabled for maximum flexibility, but you can adjust these settings to suit your organization's needs.
Note:By default, all document types are enabled for maximum flexibility, but you can adjust these settings to suit your requirements (i.e. unchecking certain documents).

You can also create exceptions at a document or country level. For example, you might only accept driver’s licenses in certain countries.
-
Re-verification Policy:

Set rules for when users must re-verify their identities based on your organization’s security needs and relevant regulations.
Step 3: Branding
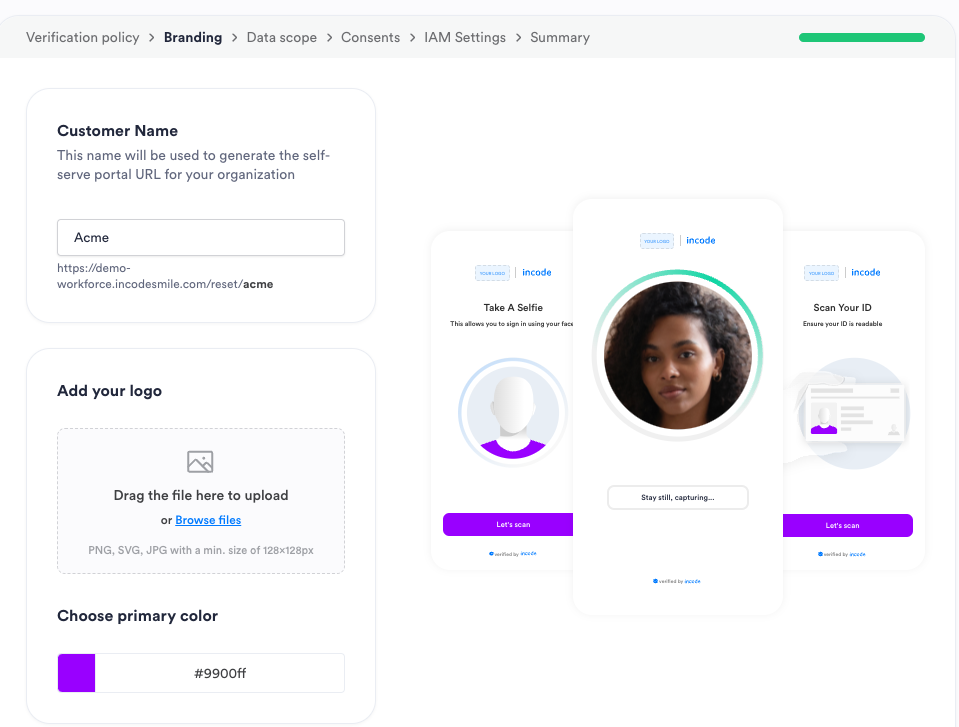
The branding step allows you to customize the look and feel of your employee's verification experience to align with your organization's visual identity. This customization helps create a seamless and familiar experience for your employees. You can configure the following:
- Company Name: Enter your organization's name as you want it to appear in the Workforce experience.
- Logo: Upload your company’s logo, which will be displayed in the Workforce experience.
- Primary Color:Choose a primary color for key interface elements (e.g., buttons, headers) to match your brand.
Ensure that the color offers sufficient contrast for readability and accessibility. A real-time preview of your changes will be displayed on the right side of the screen.
Step 4: Data Scope
Incode performs identity verification through the collection of biometrics, identity documents, and additional device signals that are necessary to ensure high-assurance identity verification. This collection represents the minimum data required for Incode to achieve the highest levels of accuracy and security.
Businesses have the option for Incode to share this data through the data scope screen, you can select to receive all data collected through the verification process, a subset of the data, or no data. In this last case only a verification attestation will be shared with you.
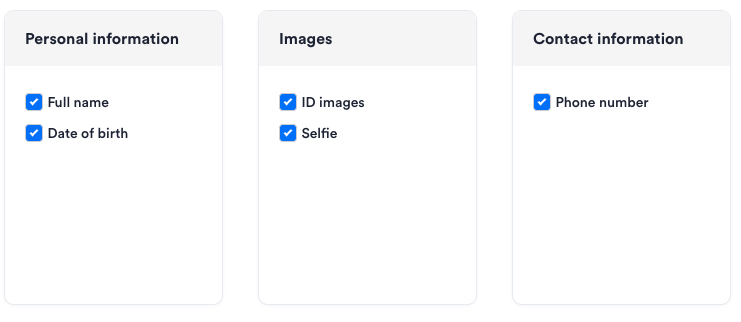
The Data Scope step allows you to customize the information that Incode Workforce shares with you on behalf of employees during the verification process.
- Customizable Data Points: You can select which data points you want to receive from Incode
- Personal Information such as full name and date of birth
- Images of employee's document and selfie
- Contact information such as phone number
- Transparency: The data points you select here will be clearly communicated to employees on the consent screen, ensuring transparency about what information is being collected and why.
- Flexibility: You can adjust these settings at any time to adapt to changing business needs or regulatory requirements.
It's best practice to collect only the data that is essential for your business processes and employee management.
Step 5 : Consent
In the Consent step, you’ll add links to your organization’s terms and conditions and privacy policy, ensuring that employees are fully informed and can agree to your policies before verification. This privacy policy will apply to the information that Incode shares with you (the information defined in the previous data scopes step).
- Multiple Policy Links: You can add links to various policy documents using the “AND” option, such as terms and conditions, privacy policy.
- Transparency: Including these links gives employees easy access to relevant policies before they provide consent.
To configure:
- Enter the title of each policy (e.g., "Terms of Service").
- Input the URL where the policy is hosted.
- Add additional policies using the "AND" button, if necessary.
- Review to ensure all necessary policies are included and links are correct.
Remember, it's important to keep these links updated if your policies change, to ensure employees always have access to the most current versions.

Step 6: IAM Settings for API Access
The Workforce product needs to sync with your employee directory to ensure only active employees can complete verifications. It also syncs to the employee directory to enable password / MFA resets at user request. This is achieved through a Service App integration which has minimum necessary data scopes.
Choose your IAM provider and follow the dedicated guides for:
Here we will continue with OKTA as an example for IAM provider.
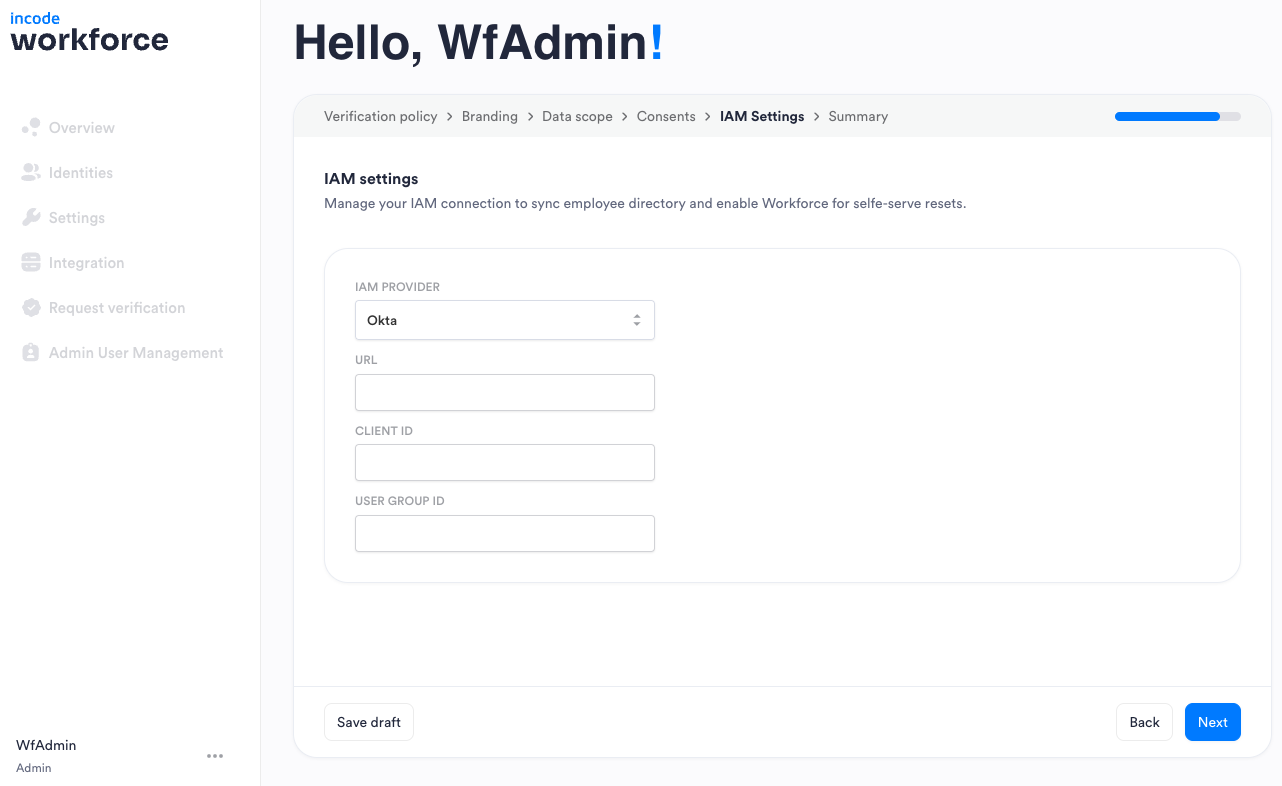
Provide the following details in the Workforce Dashboard (for more details please refer to OKTA as an IAM provider
- Client ID for the Service Application (from Okta Admin Dashboard).
- Group ID for the user group that customer wants to assign to Workforce.
- Host URL of OKTA instance. For example,
incode.okta.com.
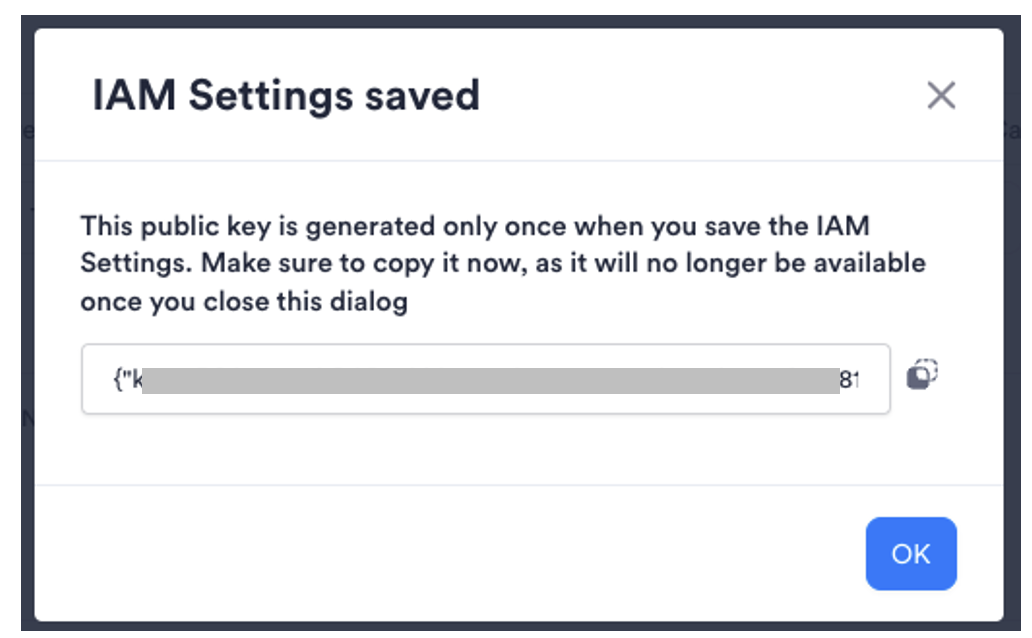
Once this is completed, you will receive a public key that needs to be copied in Okta Admin Dashboard. Please refer to Okta Service App API Integration for more details.
Step 7: Review and Finalize
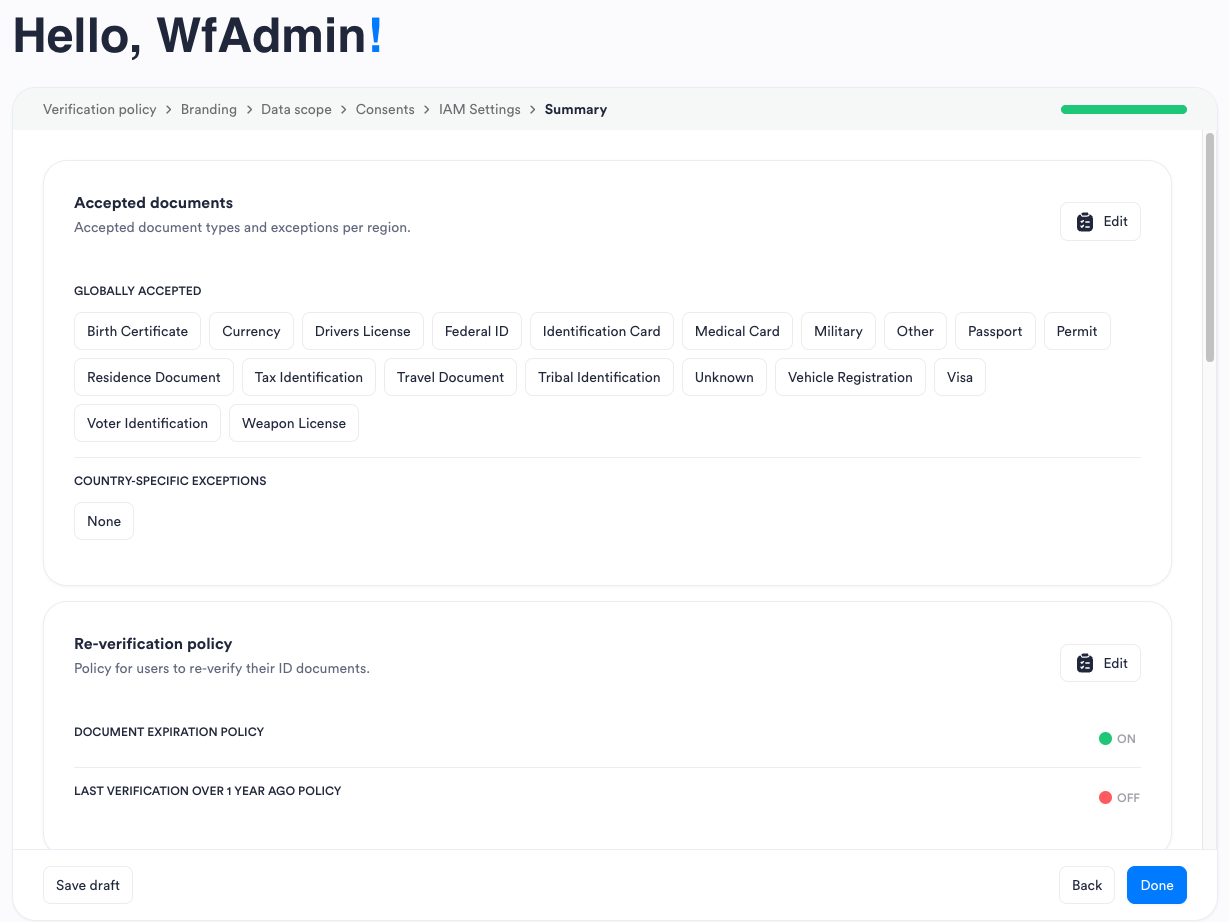
In the Review and Finalize step, you can review all the configurations you’ve made throughout the wizard, including verification policy, branding, data scope, and consent.
- Review all settings related to verification policy, branding, data scope, and consents.
- Make any necessary changes by clicking on the respective sections to go back and modify them.
- Once you're satisfied with all the configurations, you can finalize and complete the setup process for Workforce.
This final review ensures that all aspects of your Workforce setup are exactly as you want them before going live. Take your time to carefully review each section, as these settings will define how your employees interact with the Workforce platform.
After you've reviewed everything and made any final adjustments, click the "Done" button to implement your configurations and launch your customized Workforce platform.
Once the setup is complete, Workforce is ready to use with out-of-the-box features like self-service portal and Helpdesk verifications.
Next Steps:
Explore integration templates for additional use cases, such as IAM authenticators or Slack integrations, available in the dashboard. We continuously add new partners, so stay tuned!
- Okta: Set up an OIDC-based Authenticator within Okta to use in enrollment and authentication policies.
- Slack: Install Incode Workforce App on your Slack teamspace so that employees can request verifications on demand via slash commands or protect zoom meeting links with an identity wall.
Updated 8 months ago
