Configure Incode as an SSO Provider
Enable Incode as a trusted Identity Provider (IdP) in Okta to deliver a seamless, passwordless login experience. By configuring Incode as the SSO provider, users can authenticate directly with Incode’s identity verification, allowing it to serve as the sole authentication factor for accessing Okta and downstream applications. This setup simplifies user access while maintaining strong security through Incode’s biometric and document-based verification.
Prerequisites
- Before starting, ensure you have setup Incode Workforce Portal access & an Okta Preview tenant.
- Complete the Okta Directory Sync: https://workforce.developer.incode.com/update/docs/okta-service-app-api-integration#/
Step 1: Configure an OpenID Connect (OIDC) Provider IdP Connection
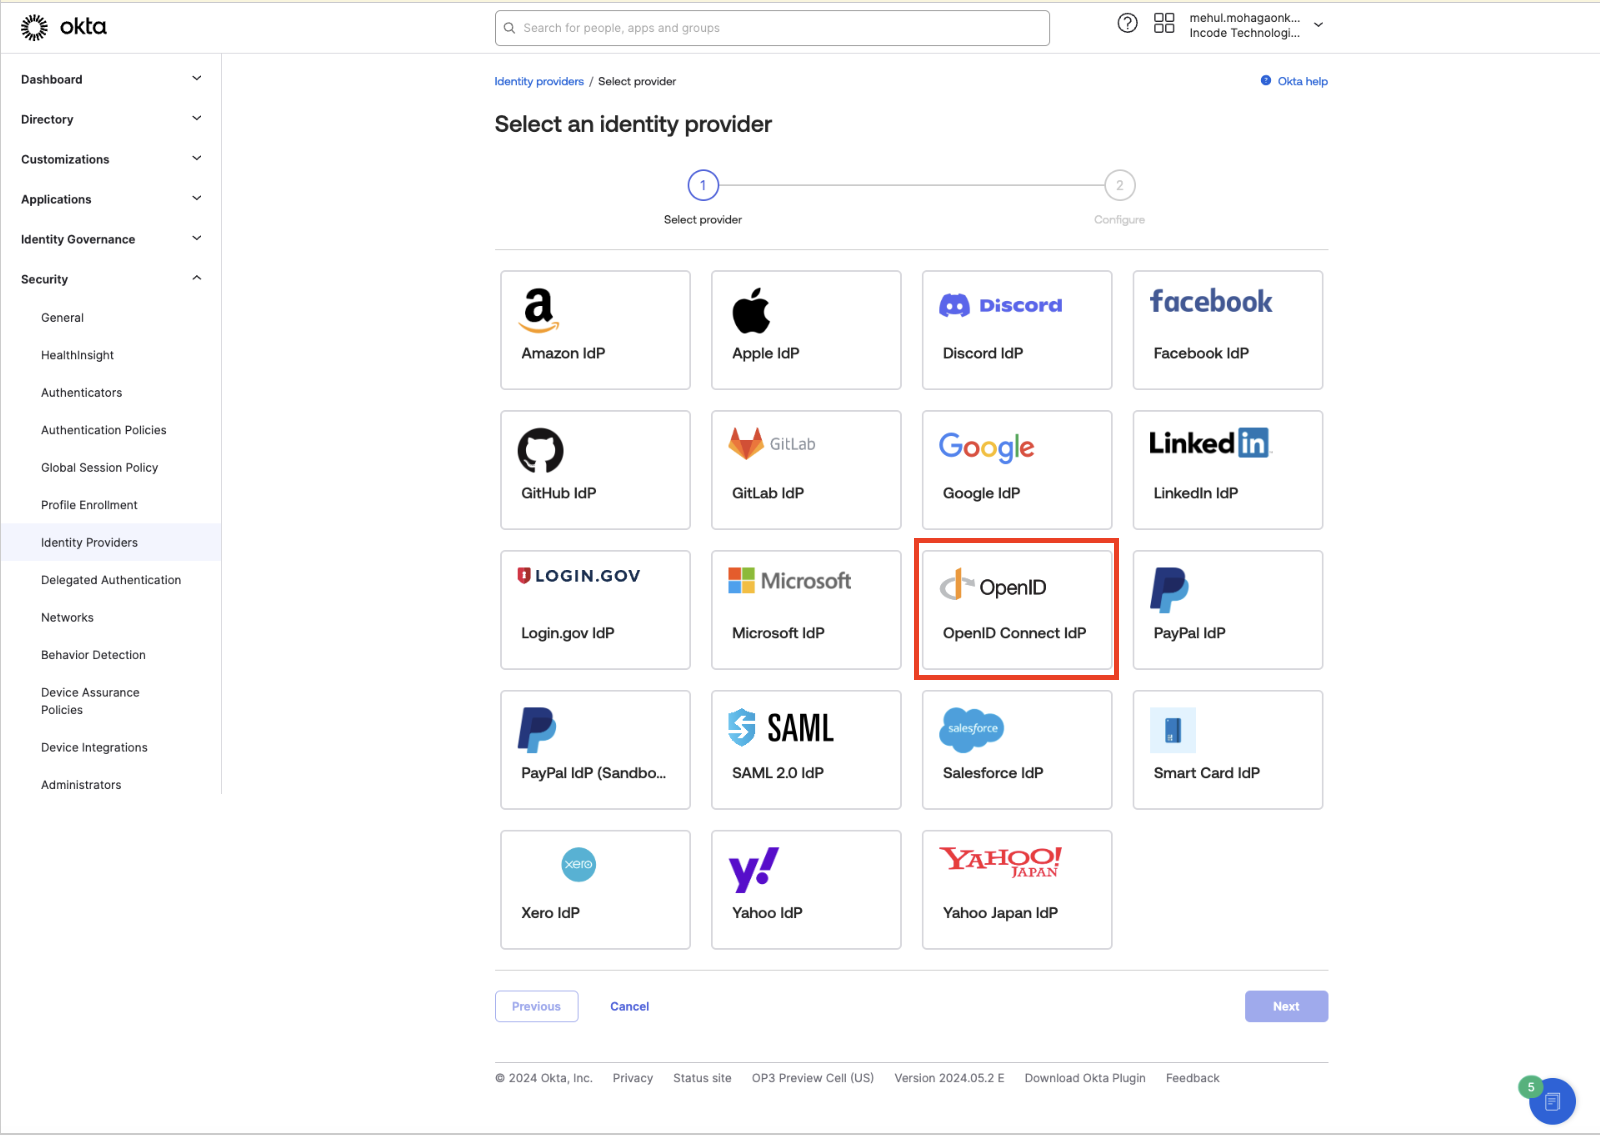
- OKTA Admin Dashboard Add Identity Provider: In the Okta Admin Dashboard, navigate to: Security -> Identity Providers -> Add Identity Provider, select the OpenID Connect IDP
- OKTA Admin Dashboard Configure IDP: Add a name for IDP and change the mode to SSO. Make sure the scopes match the required scopes listed: email, openid, profile

- Workforce Dashboard Create OKTA Integration: In your Workforce dashboard, navigate to Integrations and click New Integration. Choose OpenID Connect integration and click Continue.
- Workforce Dashboard Configure Integration: Give your integration a name. This name will be shown in analytics and give insights about verifications done with this particular integration.
- Workforce Dashboard/OKTA Admin Dashboard Copy Fields: Copy the following seven fields from the Incode Workforce Dashboard to Okta:
-
Client ID - Copy the unique client id generated for your integration to OKTA Client ID
-
Client Secret - Copy pre-generated Client Secret (or generate new) to OKTA Client Secret
-
Endpoints: - Copy corresponding endpoints to OKTA endpoints
- Issuer URL
- Authorize URL
- Token URL
- JWKS URL
- Userinfo URL
-
Copy these URLs to the corresponding OKTA Client ID, Client Secret, and Endpoints

- OKTA Admin Dashboard Authentication Settings:
- IdP username: idpuser.email
- Match against: Okta username
- Account link policy: Enable automatic linking

- OKTA Admin Dashboard_ Save and Finalize: Choose Authentication type Client secret. After saving the IdP, return to the Incode Workforce Dashboard and copy the Redirect URI.
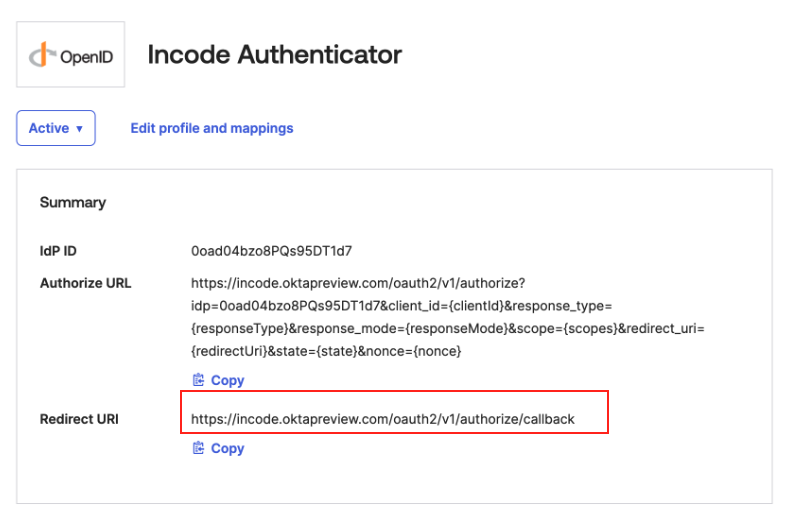
Copy Redirect URI
- Workforce Dashboard Paste Redirect URI: In your Workforce OIDC Integration paste Redirect URI from OKTA to Redirect URIs.
- Workforce Dashboard Review and Save: Review your settings by clicking continue to move through the steps. On the last step, click Save.
Step 2: Configure a Routing Rule
The next configuration steps solely depend on how you plan on routing your users to use Incode as an Identity Provider. In this example, we'll be using a customer attribute value to route users based on that attribute value.
Prior to the steps below, you will need to create a custom attribute called Incode_SSO and assign the value True to a test user account.
- OKTA Admin Dashboard Routing Rules: In the Okta Admin Dashboard, navigate to: Security -> Identity Providers -> Routing Rules -> Add Routing Rule
- OKTA Admin Dashboard Routing Rules: Under User Matches, select User Attribute Incode_SSO Starts with True.
- OKTA Admin Dashboard Routing Rules: Under IdP, select the IdP configuration you created in step 1.

- OKTA Admin Dashboard Routing Rules: Select Create Rule
Step 3: Test the Integration
- OKTA App Portal Navigate to your app portal: org_name.oktapreview.com
- OKTA App Portal Enter the username and select Next -> You'll be redirect to Incode
- OKTA App Portal Complete the Identity Verification Process, if successful, you'll gain access to your Okta App Portal